What’s In My Bag in 2022?
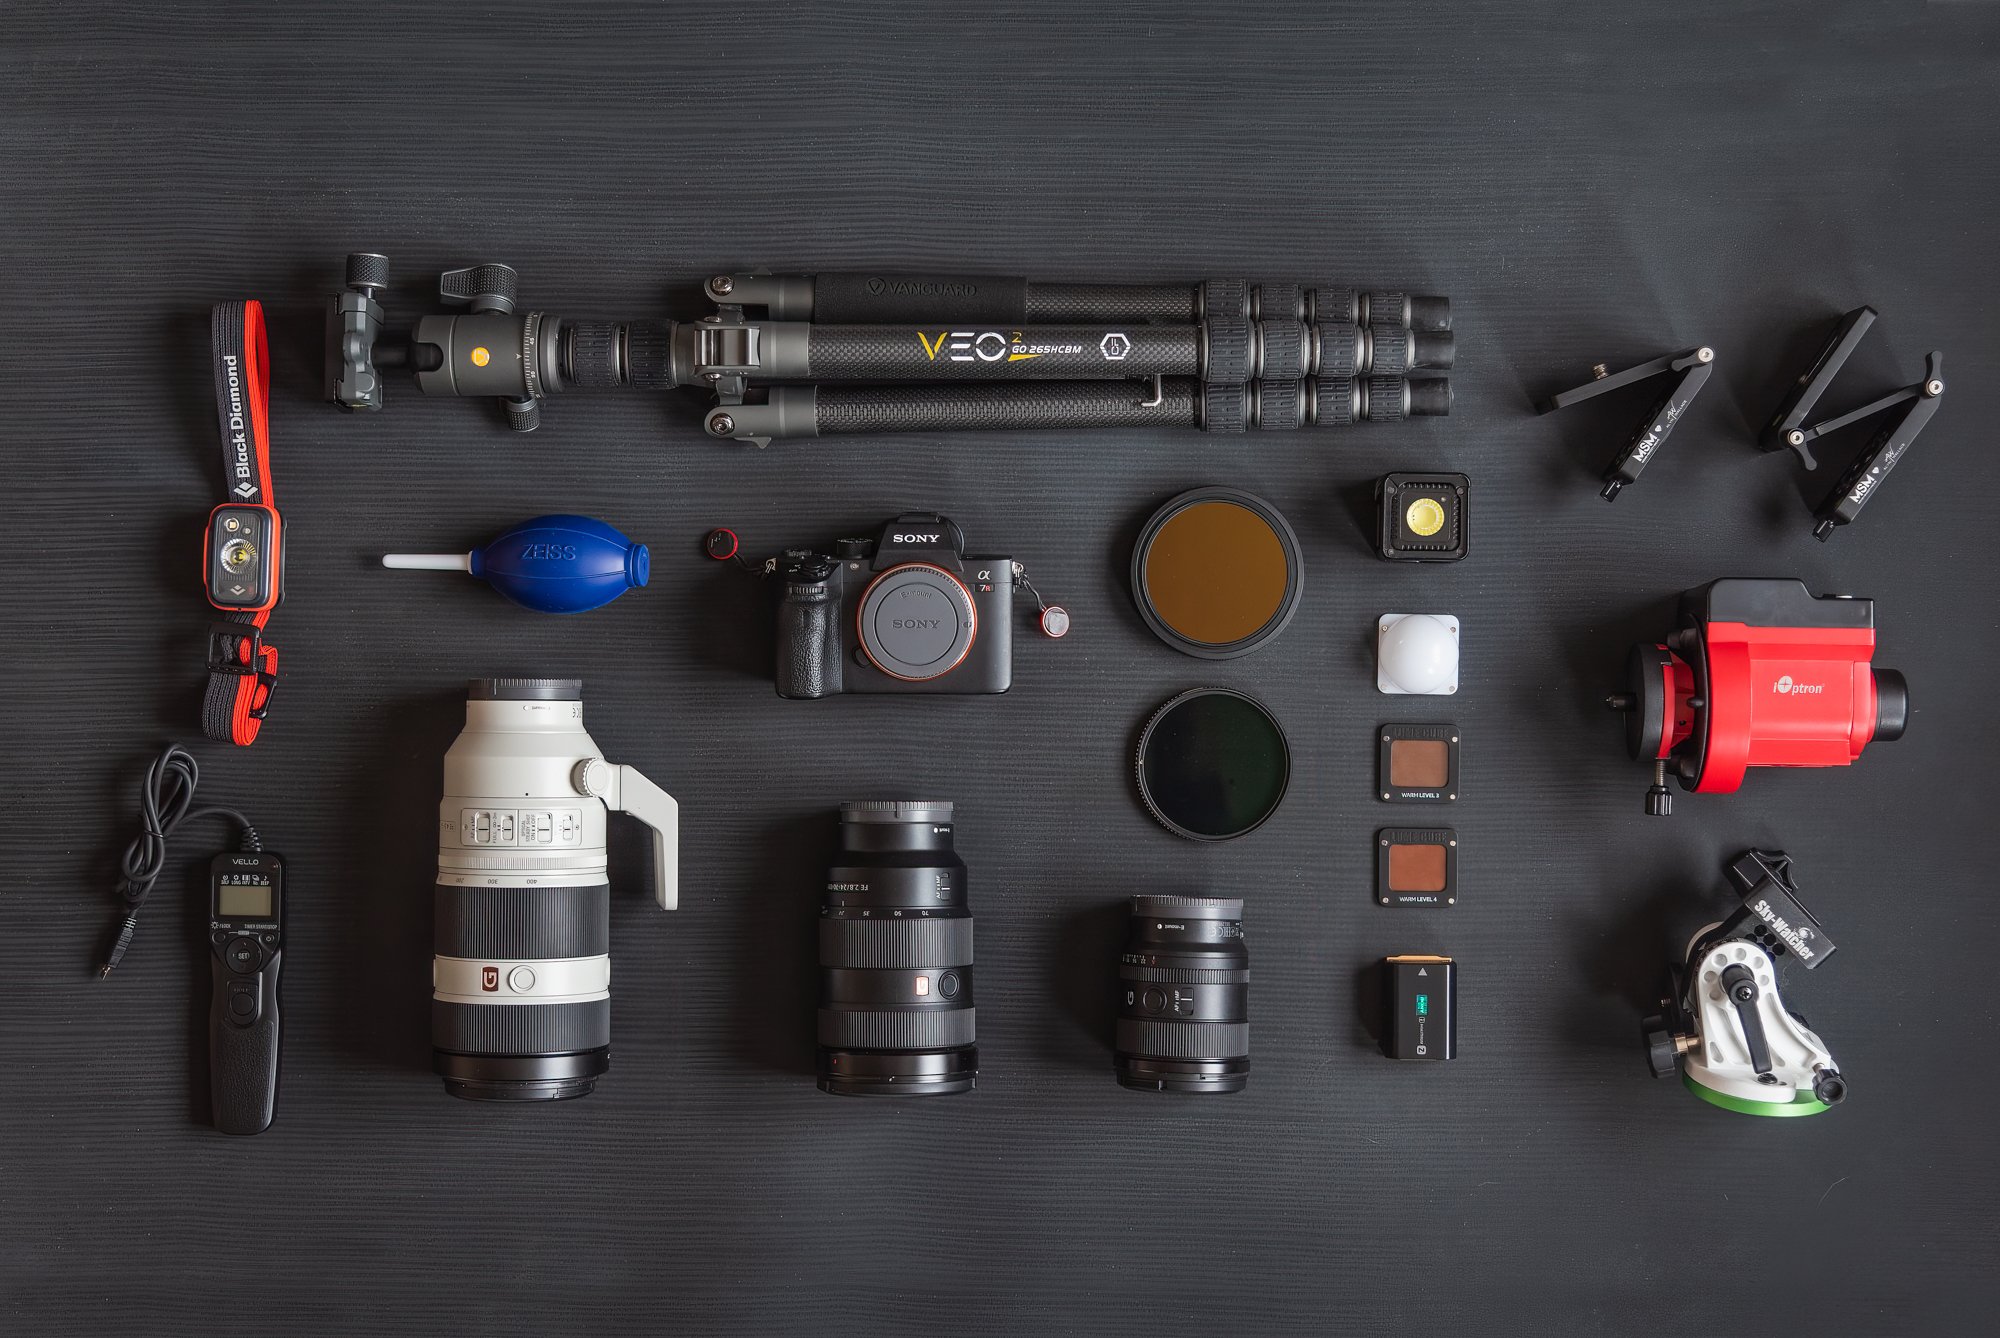
I switched over from Nikon about a year ago, and I landed on the Sony A7riii for its smaller size, lower weight, and most importantly, its performance in lower light. After using the camera for a year, however, one of the things I’ve come to like the most about the camera is how customizable the camera is to the individual user. I feel that after only a year, I know the functions of the Sony A7Riii better than the Nikon I used for the three years prior.

Sony A7Riii + 100-400mm | 400mm | f/5.6 | ISO 400 | 1/2500”
Sony 100-400mm f/4.5-5.6 GM OSS: Coming from a previous camera setup where I carried a 24-120mm, 80-200mm, and a 200-500mm, I thought for a long time about a better way to capture more of the focal lengths I needed for most of my work before purchasing this lens. I wanted a lens with enough reach to capture wildlife but also wide enough to capture landscapes, which account for most of my work. The 100-400mm f/4.5-5.6 GM OSS has been a great compromise thus far, and I love using it to pick out small scenes in a grand landscape to emphasize details of a beautiful scene as much as anything else.
Sony A7Riii + 24-70mm f/2.8 | 38mm | f/7.1 | ISO 100 | 1/640” - 2 Images Focus-stacked
Sony 24-70mm f/2.8 GM: This was the first lens I purchased with my Sony A7riii, and I shot with it exclusively for several months. Many people complain about how boring this lens can be, but I love how versatile it is and would certainly not call it boring. Much of what I shoot falls in this focal range, and it’s the lens that stays on the camera in my bag most of the time. I love how sharp this lens is at virtually every aperture setting, and before purchasing the 20mm f/1.8, I found this lens even great for astrophotography. After shooting wide angle nightscapes of the Milky Way core for years, I’ve started to love slightly longer focal lengths of the core from 24-50mm. These longer lengths paired with an acceptably wide aperture of f/2.8, I can capture incredible details of our galaxy, especially when the setup is paired with a star tracker!

Left:
Sony A7riii + 20mm G | f/1.8 G | 20mm | f/2.0 | ISO 320 | 1/200”
Right:
Sony A7riii + 100-400mm f/4.5-5.6 GM OSS | 388mm | f/5.6 | ISO 100 | 1/800”
Sony A7Riii + 20mm f/1.8 G | 20mm | f/8 | ISO 100 | 1/160”
Sony A7Riii + 20mm f/1.8 G | 20mm | f/3.5 | ISO 800 | 1/60”

Sony A7Riii + 20mm f/1.8 G + iOptron SkyGuider Pro + LumeCube with Diffuser + Warming Filters
Foreground: 20mm | f/4 | ISO 6400 | 25”
Sky: 20mm | f/2 | ISO 640 | 121” x 5 images stacked

Left:
Sony A7riii + 100-400mm f/4.5-5.6 GM OSS | 400mm | f/5.6 | ISO 500 | 1/1250”
Right:
Sony A7riii + 100-400mm f/4.5-5.6 GM OSS | 400mm | f/5.6 | ISO 1250 | 1/200”

Sony A7Riii + 20mm f/1.8 G + iOptron SkyGuider Pro + LumeCube with Diffuser + Warming Filters
Foreground: 20mm | f/8 | ISO 200 | 4”
Sky: 20mm | f/2 | ISO 640 | 121” x 5 images stacked

Left:
Sony A7Riii + 20mm f/1.8 G | 20mm | f/16 | ISO 100 | 1/200”
Right:
Sony A7Riii + 20mm f/1.8 G | 20mm | f/1.8 | ISO 3200 | 20”
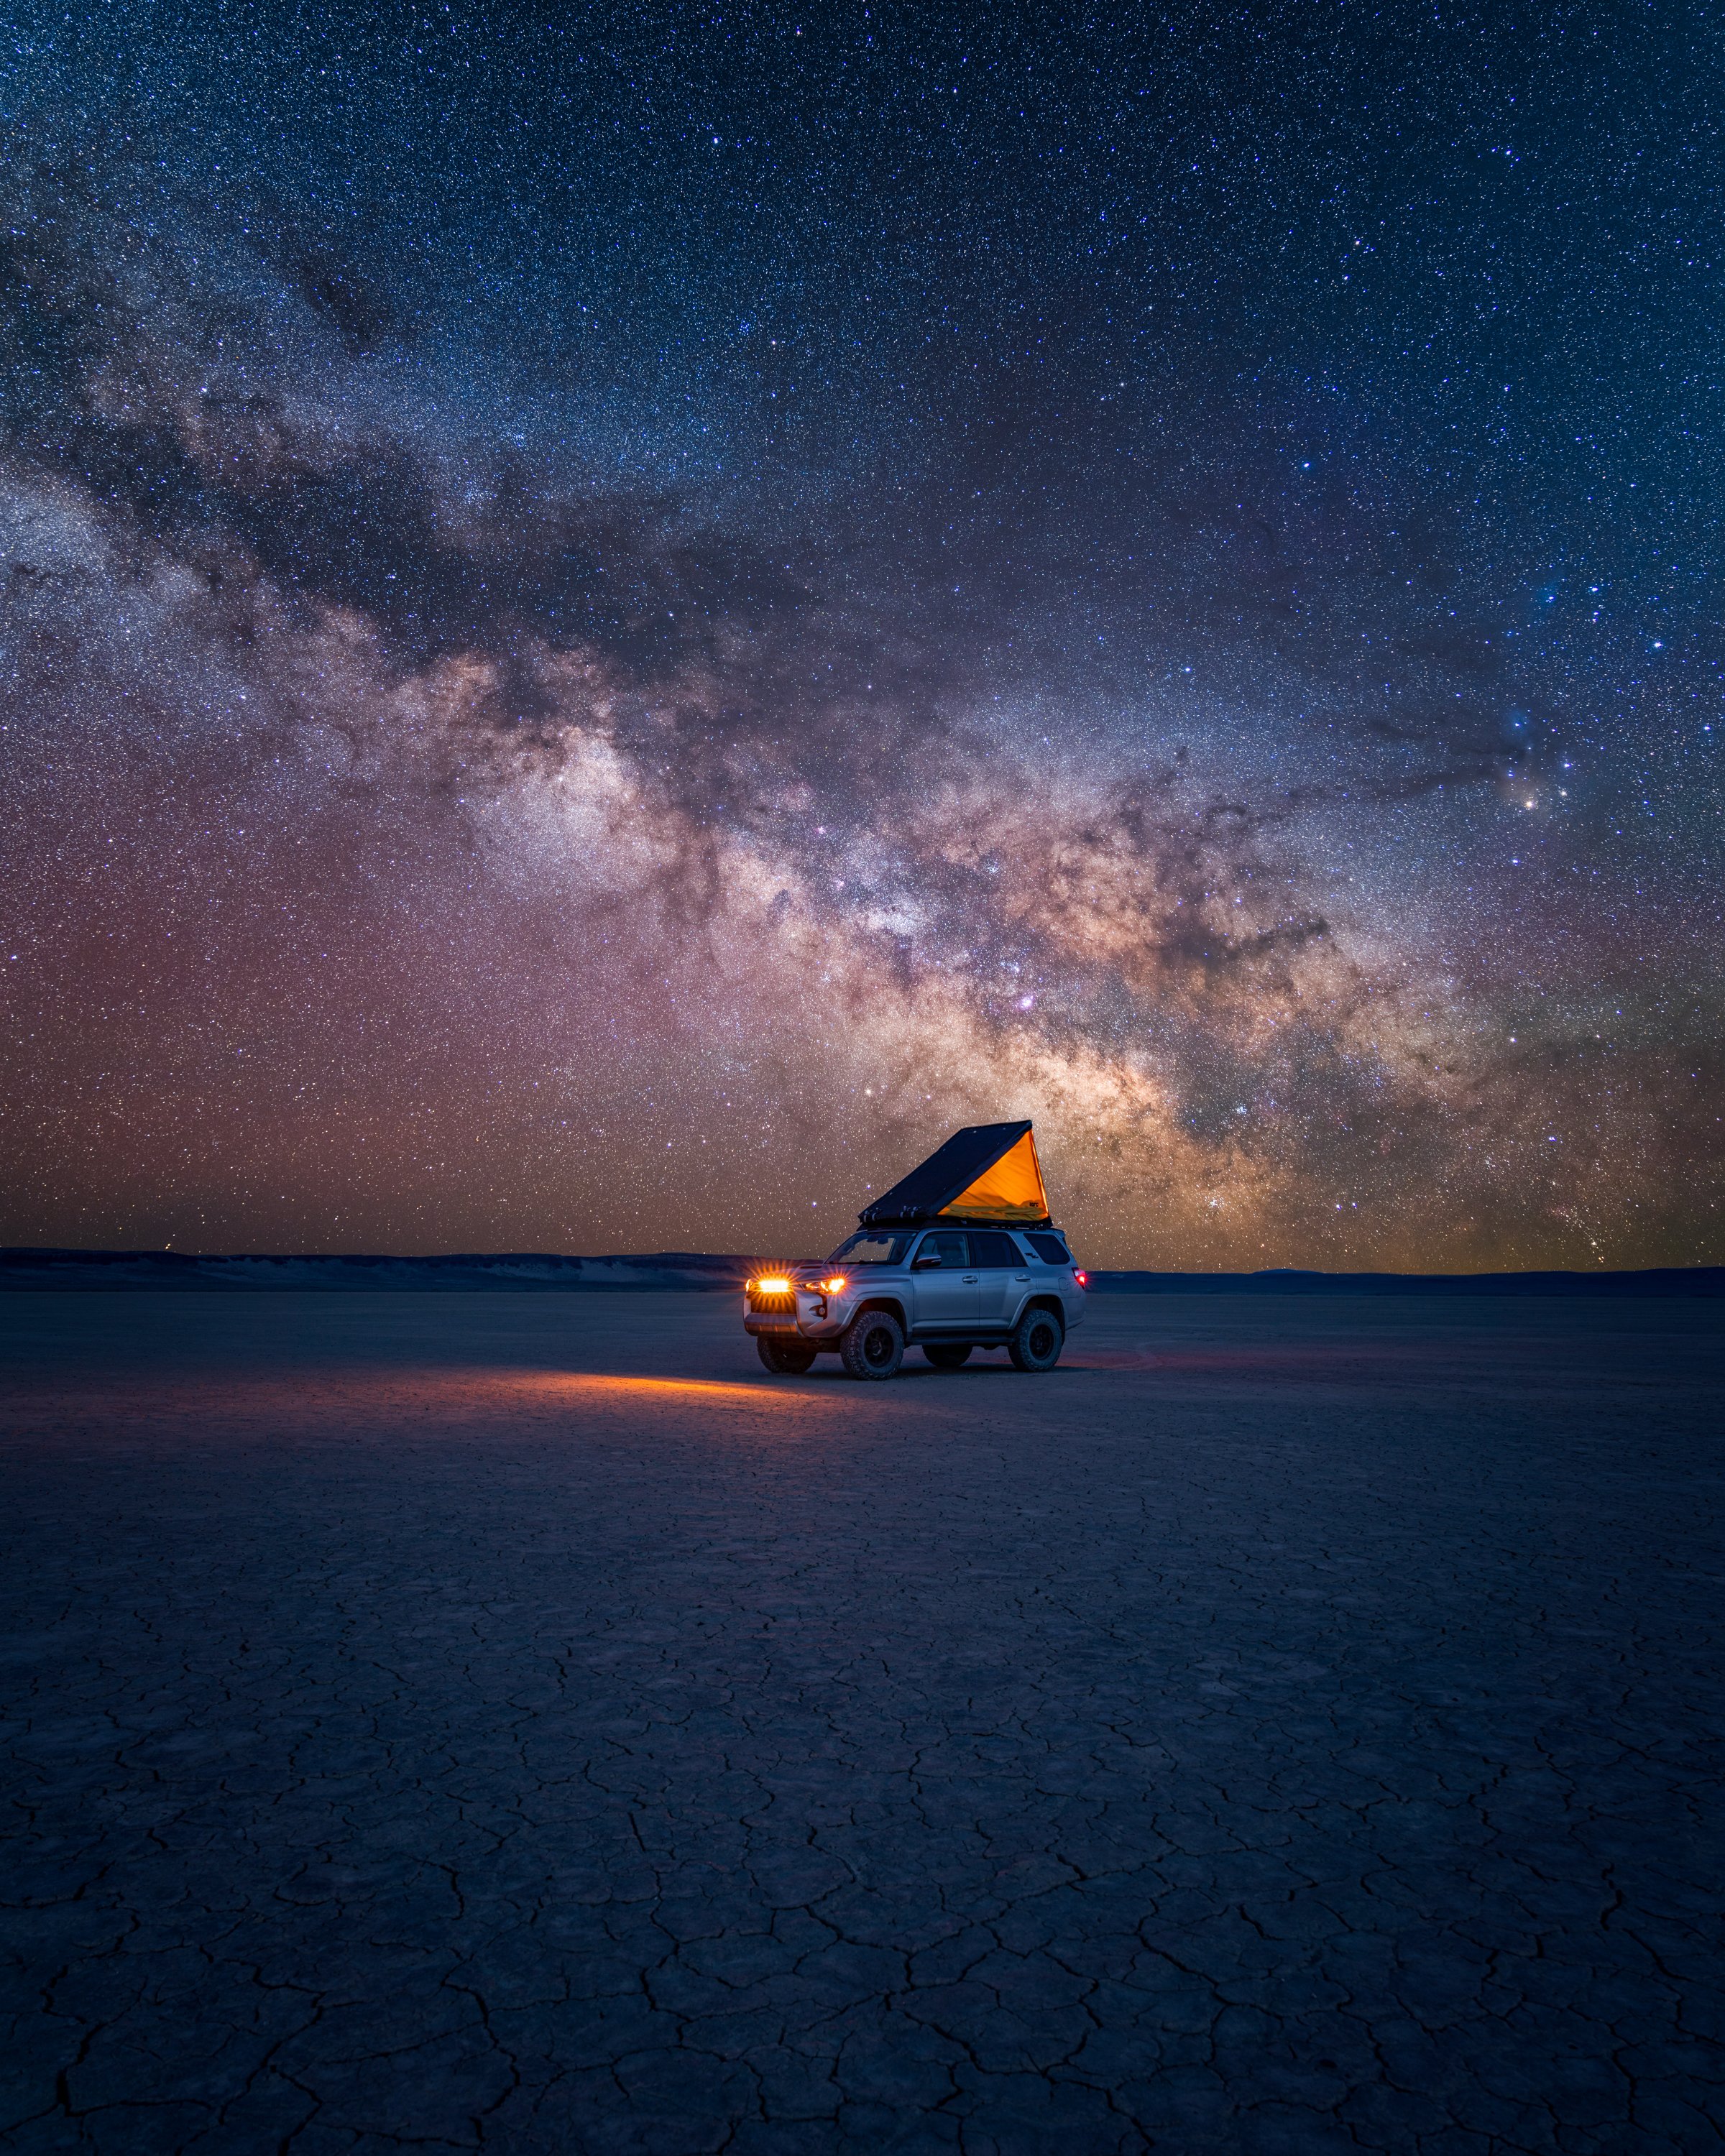
Sony 20mm f/1.8 G: I purchased this lens from a friend last year, as he was hoping to move toward Sony’s newer 14mm prime. I, however, had really come to enjoy shooting the Milky Way core at longer focal lengths and found that just before switching to Sony, I was shooting my Nikon 14-24mm more frequently at 20mm than any other focal length. I jumped on my friend’s offer, and I cannot express enough how much of a game changer this lens has been for astrophotography. In the past year, I’ve done a lot of my Milky Way shooting using a star tracker, and with my previous setup, I had to flip the hardware on the mounting bracket for the counterweight rod to produce enough torque for balancing the camera. This led to having to polar align the star tracker with the camera upside down and creating inaccuracy once it returned to upright. The Sony A7riii changed everything - the setup is lightweight enough for me to shoot without the bracket or the counterweight rod at all, which has made tracking so much easier. Even more importantly, this lens’s performance even without the tracker is incredible, and an f/1.8 aperture means I can take single images at night with remarkably low ISO’s!

Sony A7Riii + Sony 20mm f/1.8 G + MSM Rotator with Z and V Brackets
Foreground: 20mm | f/1.8 | ISO 100 | 2” x 14 vertical images merged into panoram
Sky: 20mm | f/2 | ISO 640 | 120” x 7 horizontal panels of 3 stacked images (15 total sky images in panorama)

Sony A7Riii + 24-70mm f/2.8 GM | 35mm | f/14 | ISO 125 | 1/200”
Sony A7Riii + 24-70mm f/2.8 GM + iOptron SkyGuider Pro + LumeCube with Diffuser + Warming Filters
Foreground: 24mm | f/8 | ISO 100 | 10”
SKy: 24mm | f/2.8 | ISO 1250 | 120” x 8 images stacked
Other Gear:
iOptron Skyguider Pro + Skywatcher Star Adventurer Wedge base: My primary and longest used star tracker setup. These two Sony A7riii paired with the 20mm f/1.8 G, makes for a great combination and doesn’t require the extra pack weight of a declination bracket, counterweight rod, and counterweight. I can take single exposures of the Milky Way with shutter speeds of 3 minutes or longer while retaining perfectly sharp stars with this setup.
MSM V and Z brackets: I’ve only recently acquired these, but they absolutely deserve a space in the bag for night photography. The V and Z brackets have been a game changer for readjusting the tripod head on the star tracker following a series of exposures, making Milky Way Panoramas so much less of a headache than before. I’ve recently also used either of these in place of the Skywatcher Star Adventurer Wedge base, as they can adjust quickly and may end up saving me even more space and weight in the backpack. I would absolutely recommend these for anyone using a star tracker.
Vello Shutterboss II: While I absolutely love the Sony A7Riii’s internal intervalometer, it does not allow for shutter speeds longer than 30 seconds, which I use frequently with the star tracker. This intervalometer is easy to use and great for creating much longer exposures of the Milky Way.
Black Diamond Headlamp: Having a headlamp with a redlight option is extremely helpful for taking photographs in the dark. Switching to red light helps reduce the adjustment time when transitioning back to darkness after switching the headlamp off.
Lume Cube + Warming and Diffusion Filters: I’ve used this little light for years to add an element of interest in the foreground of Milky Way Photos. Initially, photographing the Milky Way was all about the stars for me, but over the past few years, one of the most important aspects is capturing a foreground that connects the viewer to the experience of the stars and stokes their imaginations. A little light can sometimes be juct the ticket to make that happen.
Zeiss Air Blower: Taking photographs in the wild sometimes warrants being out in wet, windy, or dusty conditions. This thing helps keep dirt off the glass.
Polar Pro Circular Polarizers: The polarizer is frequently on my lens to bring down reflections in water, snow, or wet foliage and to reduce overall harsh light.